


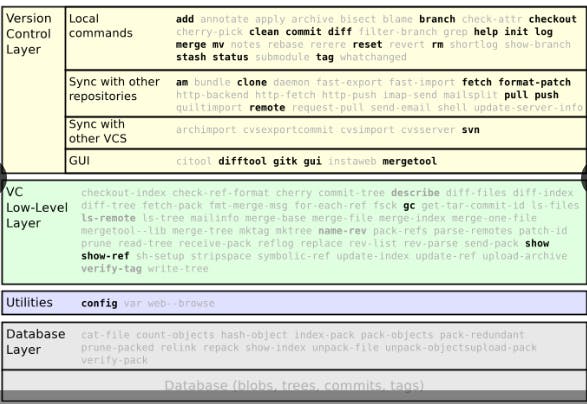
let's understand what is Version Control System(VCS) & Why 'GIT' came into the picture?
Version control systems (VCS) are tools that help developers manage changes to their code over time. They allow developers to track the history of their code, collaborate with others, and revert changes if necessary. VCS also helps manage conflicts that arise when multiple developers are working on the same codebase.
There are two main types of version control systems:
Centralized
Distributed
Centralized VCS have a single repository that serves as the central point of control, while distributed VCS allows each developer to have their local copy of the repository.
Git is a distributed VCS that was created by Linus Torvalds in 2005. It was designed to be fast, efficient, and scalable, making it ideal for managing large codebases with many contributors. Git also has a powerful branching and merging system that makes it easy for developers to work on multiple versions of the code at the same time. Git's popularity proliferated due to its powerful features, ease of use, and the fact that it is open-source and free to use.
Yeah, that's about it for Git today. If you want to learn more, you can read Git Documentation.
Getting Started with Git:
We did say Git is a software tool, so go ahead and grab the executable file for your Operating System.
If you have Git installed, open the terminal (if you’re using Mac or Linux) or command prompt (if using Windows). Please keep your terminal open, we’ll be using it for a while…
Set up your Git environment: After installing Git, you need to configure your environment by setting up your user name and email address. This information is used to identify you as the author of the commits.
You’d only have to do it this one time. Punch the following TWO instructions into your terminal/command prompt:
git config --global user.name "Your Name Comes Here"
git config --global user.email you@yourdomain.example.com
After you have set up your global Git configurations using the git config command, the next step is to navigate to the directory where you want to start working.
Use the following command to initialize a new local Git repository:
git init
This command will create a new .git directory in your current working directory and initialize it as a local Git repository. You can then start adding files to your repository, commit changes, and perform other Git operations.
I repeat, do not execute git init more than once in a project folder.
Nothing bad will happen, but it’s just pointless. You initialize your project directory as a local git repository once and only once.
Final note: Remember, To use Git commands, make sure you're in your project directory. If you close your terminal/command prompt, reopen it and navigate back to your project directory before running Git commands. If you run a Git command without being in your project directory, you'll see an error.
fatal: not a git repository (or any of the parent directories): .git
The staging area (aka the "index")
Usual version control systems provide two spaces:
the repository
(the whole history of your project)
the working tree(or local copy)
(the files you are editing and that will be in the next commit)
Git introduces an intermediate space: the staging area(also called index)
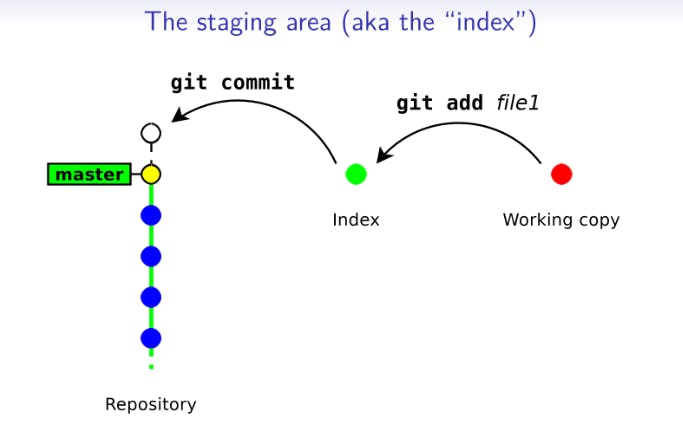
The index stores the files scheduled for the next commit:
git add files -->copy files into the index
git commit -->commits the content of the index
"git add" is used to add files or changes to the staging area, which is a temporary area where Git stores files that are ready to be committed. You can specify specific files to add, or use the "git add ." command to add all changes in the current directory.
- To add a single file to the staging area:
git add myfile.txt
- To add all files in a current directory to a staging area:
git add .
To finally save the files to the local repository, enter the following code in your terminal/command prompt:
git commit -m "short descriptive message"
"git commit" command to create a new commit with those changes. A commit is like a snapshot of your project's current state, and each commit has a unique identifier that allows you to track changes over time. When you commit changes, you can also add a commit message to describe what you changed and why.
Just a passing mention, there are conventions (standards) for how to properly write git commit messages. Here's one way to write good commit messages.
Updating files
$ echo 'blah blah blah' >> myfile.txt

$ git commit

On branch master
Your branch is up to date with 'origin/master'.

Changes not staged for commit:
  (use "git add/rm <file>..." to update what will be committed)
  (use "git restore <file>..." to discard changes in working directory)
Git complains because the index is unchanged(nothing to commit)
We need to run git add to copy the file into the index
Bypassing the index
Running git add & git commit for every iteration is tedious.
Git provides a way to bypass the index.
git commit -a -m "Commit message"
This command commits files (or dirs) directly from the working tree
Note: when bypassing the index, Git ignores new files
"git commit ." commits only files that were present in the last commit(updated files)
"git add ." && "git commit" commits everything in the working tree(including new files)

Understanding Git Diff
To show the difference between two commits, you can use the git diff command with the commit hashes or branch names of the two commits.
Here's an example of how to show the difference between two commits using their commit hashes:
git diff commit-hash-1 commit-hash-2
This will show the difference between the two commits, with the changes made in commit-hash-2 since commit-hash-1.
Deleting Files
To delete a file from your local repository and commit the change using Git, you can follow these steps:
Delete the file from your local repository using your operating system's file manager or command-line tools. For example, if you wanted to delete a file named
myfile.txt, you could run the commandrm myfile.txt(on Unix-based systems) ordel myfile.txt(on Windows).# Delete the file from your local repository rm myfile.txtCommit the change using the "git commit" command. You should include a commit message that describes the change you made. For example, you could run the command
git commit -m "Delete myfile.txt".# Commit the change with a message git commit -m "Delete myfile.txt"
Conclusion
In this blog post, we covered the basics of Git, starting with Git configuration using git config commands. We then learned how to create a Git repository using git init and understand the concept of the git staging area. We covered the essential git add and git commit commands to the stage and save changes respectively. We also learned how to compare changes between versions using the git diff command and how to remove files from a Git repository using the git rm command. This blog post provides an excellent foundation to get started with Git, and in the upcoming blog post, we will cover Git branching and merging systems.
Thank you for taking the time to read the article! If you found it helpful or informative, please consider giving it a like and leaving a comment to let me know your thoughts. Your feedback is always appreciated!
"Check out[https://hashnode.com/Kunal Kushwaha ]'s website to learn more about their work. I've found their expertise and insights to be incredibly valuable and inspiring."