
"Azure PowerShell Unleashed: Master the Art of Cloud Control"
"Unraveling the Potential of Azure PowerShell for Cloud Command and Control"


Introduction
PowerShell: Your Cross-Platform Task Automation Solution
In the ever-evolving world of IT, the need for a versatile and powerful automation tool has never been greater. That's where PowerShell steps in as a true game-changer. PowerShell is a multi-faceted solution, comprising a command-line shell, a scripting language, and a configuration management framework. What sets it apart is its remarkable cross-platform capability, making it a preferred choice for system administrators, developers, and cloud enthusiasts.
The Three Pillars of PowerShell
Command-Line Shell: At its core, PowerShell is a robust command-line shell, allowing users to interact with their systems, both locally and remotely, using a comprehensive set of commands. Its user-friendly syntax, inspired by Unix shells, makes it accessible to those familiar with command-line interfaces. With PowerShell, you can easily manage your system resources and execute tasks.
Scripting Language: Beyond simple commands, PowerShell is a full-fledged scripting language. This means you can automate complex workflows and tasks by writing scripts. Whether it's automating routine maintenance or orchestrating intricate processes, PowerShell's scripting capabilities offer unparalleled control over your systems.
Configuration Management: For those in the realm of DevOps and infrastructure management, PowerShell serves as a powerful configuration management framework. With technologies like Desired State Configuration (DSC), you can declare the desired state of your systems. PowerShell will ensure they stay in that state, simplifying configuration management and ensuring consistency across your infrastructure.
Cross-Platform Capabilities
One of PowerShell's defining features is its cross-platform compatibility. Traditionally associated with Windows, it has now spread its wings to Linux and macOS, making it an ideal choice for cloud and hybrid environments. You can harness the power of PowerShell on your Windows, Linux, or macOS machine, ensuring a consistent experience across various platforms.
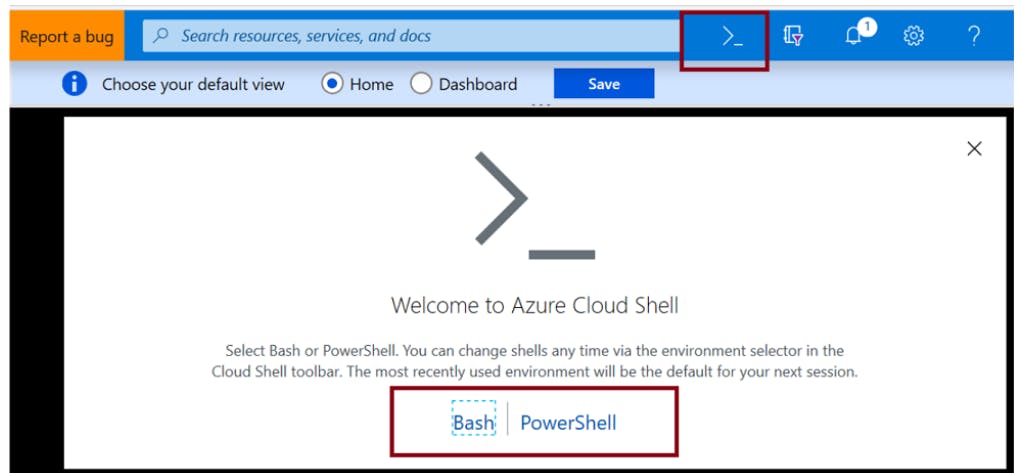
Azure Cloud Shell: Your Gateway to PowerShell
Accessing PowerShell is not limited to your local machine. Azure offers a cloud-based solution called Azure Cloud Shell, accessible from the Azure portal. Within Azure Cloud Shell, you have the option to choose PowerShell mode, allowing you to execute commands and scripts from anywhere with an internet connection. This brings PowerShell's automation capabilities directly to your Azure cloud environment, simplifying management and deployment tasks.
In this guide, we'll explore the world of PowerShell and unlock its potential across platforms, diving into real-world examples and practical applications. Whether you're a seasoned pro or a newcomer to the world of task automation, PowerShell is a skill worth mastering. Let's embark on this journey together and harness the true power of automation with PowerShell.
To install the Azure module in PowerShell, you can use the Install-Module cmdlet. The Azure module is commonly known as the "Az" module.
Here are the commands to install the Azure PowerShell module:
Install the Azure PowerShell module:
Install-Module -Name Az -Force -AllowClobber
The -Name Az parameter specifies the name of the module you want to install, and -Force and -AllowClobber is used to force the installation and allow overwriting of existing modules, if necessary.
Import the Azure PowerShell module:
Import-Module Az
After the installation, you need to import the module to make the Azure cmdlets available for use in your PowerShell session.
By running these commands, you'll install, update, or import the Azure module in your PowerShell environment, allowing you to interact with Azure resources and services using Azure PowerShell.
Azure Accounts
Login to Azure Account:
Connect-AzAccount
Logout of the Azure account:
Logout-AzAccount
List all subscriptions in all tenants:
Get-AzSubscription
Get subscriptions in a specific tenant:
Get-AzSubscription -TenantId "xxxx-xxxx-xxxxxxxx"
Choose subscription:
Select-AzSubscription -SubscriptionID “SubscriptionID”
These commands are essential for managing your Azure accounts, switching between subscriptions, and working with the appropriate resources and services within the chosen subscription.
Resource Groups[rg's]
Create a new Resource Group:
New-AzResourceGroup -Name 'myResourceGroup' -Location 'westeurope'
Get all resource groups:
Get-Azresourcegroups
Get a specific resource group by name:
Get-AzResourceGroup -Name "myResourceGroup”
Show resource groups by location:
Get-AzResourceGroup | Sort Location,ResourceGroupName | Format-Table -GroupBy Location
This command fetches all resource groups and sorts them first by location and then by resource group name. It also presents the results in a tabular format, grouped by location. This is useful for visualizing resource groups organized by their geographical location.
Delete a Resource Group:
Remove-AzResourceGroup -Name "ResourceGroupToDelete"
These commands are fundamental for managing and retrieving information about resource groups in your Azure subscription, making it easier to organize and access your Azure resources.
Resources within RG's
Find resources of a specific type in a resource group:
Get-AzResource -ResourceGroupName "myResourceGroup"
This command retrieves all resources within the specified resource group, "myResourceGroup." You can use this command to view a list of all the resources within a particular resource group, making it easier to manage and organize them.
Find resources of a type matching against the resource name string:
Get-AzResource -ResourceType "microsoft.web/sites" -ResourceGroupName "myResourceGroup"
Moving Resources from One Resource Group to Another:
Step 1: Retrieve existing Resource
$Resource = Get-AzResource -ResourceType "Microsoft.ClassicCompute/storageAccounts" -ResourceName "myStorageAccount"
This command retrieves a specific resource, in this case, a storage account called "myStorageAccount." You can use this resource object in the next step for moving it.
Step 2: Move the Resource to the New Group
Move-AzResource -ResourceId $Resource.ResourceId -DestinationResourceGroupName "NewResourceGroup"
This command moves the previously retrieved resource to the specified destination resource group, "NewResourceGroup." It's a useful way to reorganize your resources across different resource groups.
These commands are essential for managing and organizing resources within your Azure resource groups. Whether you need to find, create, delete, or move resources, Azure PowerShell provides powerful tools to help streamline resource management.
Virtual Machines[vm's]
List all VMs in the current subscription:
Get-AzVM
List VMs in a specific resource group:
Get-AzVM -ResourceGroupName $ResourceGroup
Get a specific virtual machine:
Get-AzVM -ResourceGroupName “resourcegroup” -Name "myVM"
Create a VM – Simplified:
New-AzVM -Name “vmname”
This simplified command is a quick way to create a VM. When you run this command, it creates a VM with the specified name and automatically populates names for all associated objects based on the VM name. This can be useful for creating a basic VM quickly with default settings.
Please note that creating a VM typically involves additional configuration options, such as specifying the virtual machine size, image, resource group, network configuration, and more. The simplified command may not cover all the configuration details you might need for your specific use case.
Create a VM configuration:
$vmconfig = New-AzVMConfig -VMName “systemname” -VMSize "Standard_D1_v2"
Add configuration settings (Operating System):
$vmconfig = Set-AzVMOperatingSystem -VM $vmconfig -Windows -ComputerName “systemname” -Credential $cred -ProvisionVMAgent EnableAutoUpdate
Add a network interface:
$vmconfig = Add-AzVMNetworkInterface -VM $vmconfig -Id $nic.Id
Specify a platform image:
$vmconfig = Set-AzVMSourceImage -VM $vmconfig -PublisherName "publisher_name" -Offer "publisher_offer" -Skus "product_sku" -Version "latest"
Create a VM:
New-AzVM -ResourceGroupName “resourcegroup” -Location “westeurope” -VM $vmconfig
This command creates a new virtual machine using the previously defined VM configuration ($vmconfig). It's important to have run all the previous commands to set up the VM configuration before creating the VM.
Start a VM:
Start-AzVM -ResourceGroupName “resourcegroup” -Name “vmname”
Stop a VM:
Stop-AzVM -ResourceGroupName “resourcegroup” -Name “vmname”
Restart a running VM:
Restart-AzVM -ResourceGroupName “resourcegroup” -Name “vmname”
Delete a VM:
Remove-AzVM -ResourceGroupName “resourcegroup” -Name “vmname”
These commands allow you to create, configure, and manage virtual machines in Azure effectively. Ensure you replace placeholders like "systemname," "resourcegroup," "vmname," and other variables with the actual values in your environment.
Networking
List virtual networks
Get-AzVirtualNetwork -ResourceGroupName “resourcegroup”
Get information about a virtual network
Get-AzVirtualNetwork -Name "myVNet" -ResourceGroupName “resourcegroup”
List subnets in a virtual network
Get-AzVirtualNetwork -Name "myVNet" -ResourceGroupName “resourcegroup” | Select Subnets
Get all IP addresses from a resource group
Get-AzPublicIpAddress -ResourceGroupName “resourcegroup”
Get all load balancers from a resource group
Get-AzLoadBalancer -ResourceGroupName “resourcegroup”
Get all network interfaces from a resource group
Get-AzNetworkInterface -ResourceGroupName “resourcegroup”
Get information about a network interface
Get-AzNetworkInterface -Name "NIC1" -ResourceGroupName “resourcegroup”
Check the provisioning status for Azure Express Route Circuit
Get-AzExpressRouteCircuit -ResourceGroupName "Test-Resource" -Name "Test-Circuit"
Upgrade ExpressRoute Gateway SKU
Resize-AzVirtualNetworkGateway
Create subnet configurations
$subnet1 = New-AzVirtualNetworkSubnetConfig -Name "Subnet1" -AddressPrefix XX.X.X.X/XX
$subnet2 = New-AzVirtualNetworkSubnetConfig -Name "Subnet2" -AddressPrefix XX.X.X.X/XX
Create a virtual network
$vnet = New-AzVirtualNetwork -Name "myVNet" -ResourceGroupName “resourcegroup” -Location $location -AddressPrefix XX.X.X.X/XX -Subnet $slsubnet1,$slsubnet2
#Note: Make sure to create the subnets first as per the previous command above.
Test for a unique domain name
Test-AzDnsAvailability -DomainNameLabel "myDNS" -Location $location
You can specify a DNS domain name for a public IP resource, which creates a mapping for domainname.location.cloudapp.azure.com to the public IP address in the Azure-managed DNS servers. The name can contain only letters, numbers, and hyphens. The first and last character must be a letter or number and the domain name must be unique within its Azure location. If True is returned, your proposed name is globally unique.
Create a public IP address
$pip = New-AzPublicIpAddress -Name "myPublicIp" -ResourceGroupName “resourcegroup” -DomainNameLabel "myDNS" -Location $location AllocationMethod
Dynamic #The public IP address uses the domain name that you previously tested and is used by
the frontend configuration of the load balancer.
Create a frontend IP configuration
$frontendIP = New-AzLoadBalancerFrontendIpConfig -Name "myFrontendIP" PublicIpAddress $pip #The frontend configuration includes the public IP address that you previously created for incoming network traffic.
Create a backend address pool
$beAddressPool = New-AzLoadBalancerBackendAddressPoolConfig -Name "myBackendAddressPool" #Provides internal addresses for the backend of the load balancer that are accessed through a network interface.
Create a probe
$healthProbe = New-AzLoadBalancerProbeConfig -Name "myProbe" RequestPath 'HealthProbe.aspx' -Protocol http -Port 80 -IntervalInSeconds 15 ProbeCount 2 #
Create a load balancing rule
$lbRule = New-AzLoadBalancerRuleConfig -Name HTTP -FrontendIpConfiguration $frontendIP -BackendAddressPool $beAddressPool -Probe $healthProbe -Protocol Tcp -FrontendPort 80 -BackendPort 80
#Contains rules that assign a public port on the load balancer to a port in the backend address pool
Create an inbound NAT rule
$inboundNATRule = New-AzLoadBalancerInboundNatRuleConfig -Name "myInboundRule1" -FrontendIpConfiguration $frontendIP -Protocol TCP -FrontendPort 3441 -BackendPort 3389
#Contains rules mapping a public port on the load balancer to a port for a specific virtual machine in the backend address pool
Create a load balancer
$loadBalancer = New-AzLoadBalancer -ResourceGroupName “resourcegroup”
-Name "myLoadBalancer" -Location $location -FrontendIpConfiguration $frontendIP
InboundNatRule $inboundNATRule -LoadBalancingRule $lbRule -BackendAddressPool
$beAddressPool -Probe $healthProbe
Create a network interface
$nic1= New-AzNetworkInterface -ResourceGroupName “resourcegroup” Name
"myNIC" -Location $location -PrivateIpAddress XX.X.X.X -Subnet $subnet2 -
LoadBalancerBackendAddressPool $loadBalancer.BackendAddressPools[0] LoadBalancerInboundNatRule $loadBalancer.InboundNatRules[0]
#Create a network interface using the public IP address and virtual network subnet that you previously created
Remove network resources:
Remove-AzVirtualNetwork -Name "myVNet" -ResourceGroupName “resourcegroup” #Removes the specified virtual network from the resource group
Remove-AzNetworkInterface -Name "myNIC" -ResourceGroupName “resourcegroup” #Removes the specified network interface from the resource group
Remove-AzLoadBalancer -Name "myLoadBalancer" -ResourceGroupName “resourcegroup” #Removes the specified load balancer from the resource group
Remove-AzPublicIpAddress-Name "myIPAddress" -ResourceGroupName “resourcegroup” #Removes the specified public IP address from the resource group.
Here are the Azure PowerShell commands related to connecting to Azure Active Directory, user and service principal management, all in one box with explanations:
# Connect to Azure Active Directory
Connect-AzureAD
# Note: You will be prompted to enter your credentials and any additional authentication steps required.

# Disconnect from Azure Active Directory
Disconnect-AzureAD

# Get all users in Azure AD
Get-AzureADUser

# Get a specific user by their Object ID (replace "user@contoso.com" with the actual user's Object ID)
Get-AzureADUser -ObjectId "user@contoso.com"

# Remove a user (replace "user@contoso.com" with the actual user's Object ID)
Remove-AzureADUser -ObjectId "user@contoso.com"

# Create a new user in Azure AD
# Step 1: Create a Password Profile
$PasswordProfile = New-Object -TypeName Microsoft.Open.AzureAD.Model.PasswordProfile

# Step 2: Set the user's password
$PasswordProfile.Password = "Password"

# Step 3: Create the new user
New-AzureADUser -DisplayName "New User" -PasswordProfile $PasswordProfile -UserPrincipalName "user@contoso.com" -AccountEnabled $true -MailNickName "Newuser"

# Create a Service Principal (SPN) in Azure AD
# First, create an application registration in Azure AD
# Then retrieve the Application ID
Get-AzADApplication -DisplayNameStartWith slappregistration

# Use the Application ID to create the SPN
New-AzADServicePrincipal -ApplicationId 11111111-1111-1111-1111-11111111111 -Password $securePassword

# Assign a role to the Service Principal (SPN) for a specific resource group
# Replace "resourcegroup" with the actual resource group name
# Replace "11111111-1111-1111-1111-11111111111" with the actual Service Principal Object ID
# Replace "Reader" with the desired role definition (e.g., Contributor, Reader, etc.)
New-AzRoleAssignment -ResourceGroupName "resourcegroup" -ObjectId 11111111-1111-1111-1111-11111111111 -RoleDefinitionName Reader

# View current role assignments for the resource group
Get-AzRoleAssignment -ResourceGroupName "resourcegroup" -ObjectId 11111111-1111-1111-1111-11111111111
Continue Your Azure PowerShell Journey
Congratulations on learning about Azure PowerShell and its capabilities! To deepen your knowledge and explore more commands, here are some resources and suggestions to help you on your journey:
Official Microsoft Documentation: Microsoft offers comprehensive documentation on Azure PowerShell. Visit the Azure PowerShell documentation to access detailed guides, tutorials, and command references.
Microsoft Learn: Microsoft Learn provides hands-on, interactive modules to help you learn Azure PowerShell and other Azure services. Explore the Azure PowerShell learning path to practice your skills.
Azure PowerShell GitHub Repository: Check out the Azure PowerShell GitHub repository to stay up-to-date with the latest releases, contribute to the project, and access community-driven resources.
Online Courses: Platforms like Udemy, Coursera, and Pluralsight offer courses on Azure PowerShell. These courses are often taught by industry experts and provide in-depth knowledge.
Community Forums: Join Azure and PowerShell communities, such as the Azure PowerShell Forum or Stack Overflow, to ask questions, share your experiences, and learn from others.
YouTube Tutorials: Many creators on YouTube offer step-by-step tutorials on using Azure PowerShell for various tasks. Search for video tutorials that align with your interests and needs.
Azure Blog and News: Stay updated with Azure announcements, best practices, and use cases by reading the Azure Blog and subscribing to Azure-related news sources.
Remember, the best way to become proficient with Azure PowerShell is to practice. Experiment with different commands, build your own scripts, and explore various Azure services. The more you practice, the more confident you'll become in managing Azure resources effectively.
Thank you for reading our blog, and we hope this information has been valuable in your Azure journey. If you have any questions or need further assistance, feel free to reach out to us or the Azure community.
Happy scripting and happy exploring!